Upgrade your space with durable luxury vinyl flooring
Are you looking for a floor that holds up to daily life and still looks amazing? Northshore Flooring & Construction might be the perfect choice. At Superior Flooring, we help homeowners and business owners find durable, waterproof, and stylish flooring that fits their budget and lifestyle. Luxury vinyl is one of our top recommendations because it checks every box: style, strength, and comfort. Whether you need flooring for a busy home or a high-traffic business space, luxury vinyl flooring gives you options.
Let’s walk through what makes luxury vinyl a favorite and how we can help you find the right fit.
Can You Install Sheet Vinyl Flooring over Existing Floors?
Yes, you can install sheet vinyl flooring over existing floors in many situations, and this can be a game-changer for homeowners looking to update their space. This method can save time, money, and effort, especially compared to completely removing old flooring. However, the success of your vinyl flooring installation depends on proper preparation and careful assessment of the existing floor’s condition. Whether you’re covering tile, hardwood, or even concrete, vinyl flooring offers a versatile, durable, and stylish option.
What Exactly is Vinyl Flooring?
Vinyl flooring is a synthetic material crafted to deliver durability, water resistance, and aesthetic versatility. Vinyl sheet flooring is one of the most popular types, available in large, flexible rolls that can be installed seamlessly across entire rooms. It’s designed to mimic other materials, like wood or stone, offering homeowners the chance to achieve high-end looks at an affordable price.
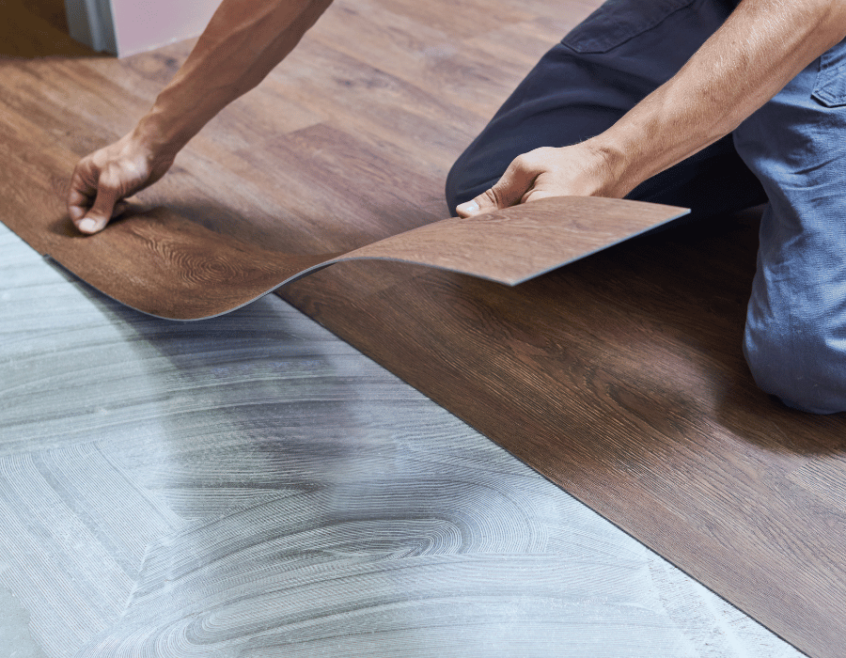
One of vinyl flooring’s biggest advantages is its water-resistant properties, making it an excellent choice for moisture-prone areas like kitchens, bathrooms, and laundry rooms. Unlike other materials, vinyl flooring is easy to clean and requires minimal maintenance, making it ideal for busy households or commercial spaces.
Advantages of Installing Sheet Vinyl Over Existing Floors
Opting to install sheet vinyl flooring over existing floors offers several benefits:
- Cost Savings – By skipping the removal of old flooring, you can save on labor costs and disposal fees.
- Reduced Installation Time – The process is quicker because there’s no need to rip out the existing floor.
- Eco-Friendly – Reusing the old flooring as a base reduces waste and is a more sustainable approach.
- Wide Style Options – Vinyl flooring is available in countless designs, allowing you to match your home’s aesthetic without extensive renovations.
- Smooth Transitions – Vinyl sheet flooring creates a uniform look, covering imperfections in the existing floor.
Key Considerations Before Installation
Before diving into installation, there are a few critical factors to keep in mind to ensure your new floor looks and performs its best:
Porous Nature
Because granite is a natural stone, it’s porous, meaning liquids can seep into the surface and cause staining if not properly sealed. You’ll need to stay on top of resealing to keep your countertops looking pristine.
- Surface Condition – The existing floor must be level, free of major cracks, and stable. Even minor imperfections can become visible under vinyl flooring.
- Moisture Levels – Check for moisture issues in the current flooring or subfloor. High moisture can lead to adhesive failure and mold growth.
- Adhesion – Certain floor materials, like carpets or heavily textured surfaces, are unsuitable for direct vinyl sheet installation.
- Height Adjustments – Installing over an existing floor may raise the floor level, potentially interfering with door clearance or transitions to adjacent rooms.
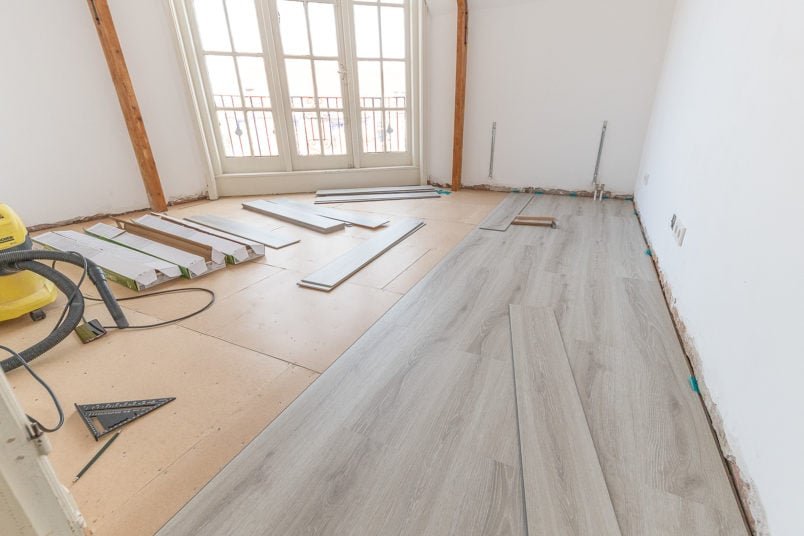
Step-by-Step Vinyl Installation Process
Installing vinyl flooring over existing floors involves careful preparation and attention to detail. Follow these steps for a successful installation:
- Evaluate the Current Floor – Inspect the existing flooring for damage, moisture, and uneven areas. Address any issues before proceeding, as these can affect the final result.
- Prepare the Surface – Clean the floor thoroughly to remove dust, grease, and debris. For certain surfaces, you may need to apply a leveling compound to smooth out imperfections.
- Lay Underlayment (if needed) – If the existing floor is uneven or incompatible, consider adding a thin underlayment to create a smooth and stable base.
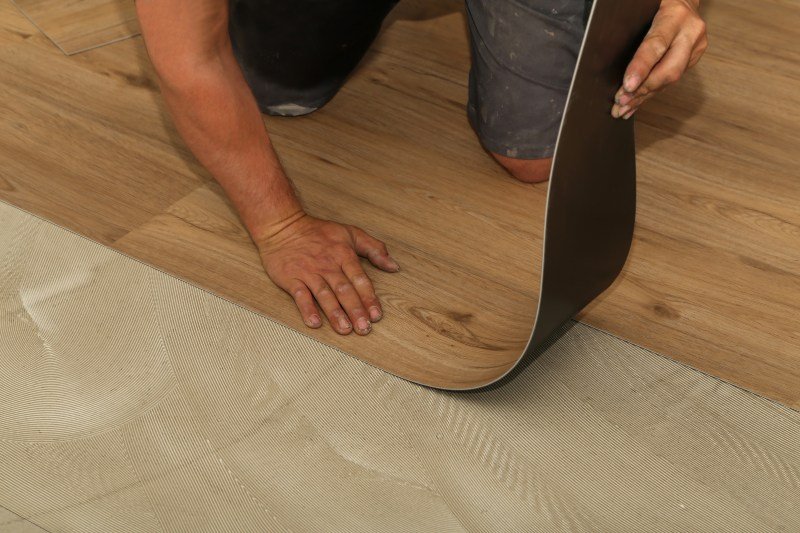
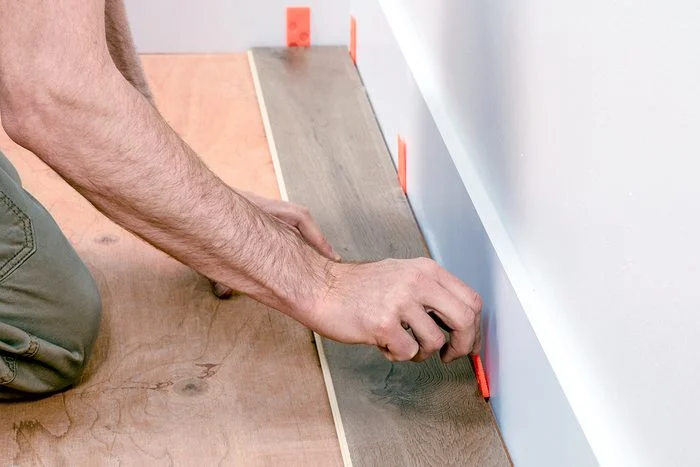
- Measure and Cut the Vinyl – Take precise measurements of the room to cut the vinyl sheet accurately. Allow for a slight overlap along the edges to trim after installation.
- Apply Adhesive – Use the recommended adhesive for your vinyl flooring type. Spread it evenly across the surface, working in small sections to prevent it from drying before the vinyl is applied.
- Position and Lay the Vinyl – Carefully place the vinyl sheet on the adhesive, ensuring it’s aligned properly. Smooth out air bubbles and wrinkles using a flooring roller or a flat tool.
- Trim the Edges – Once the vinyl is secured, trim the excess material along the edges for a clean, seamless look.
- Seal the Seams – Use a seam sealer or adhesive to secure the edges and prevent water from seeping beneath the floor.
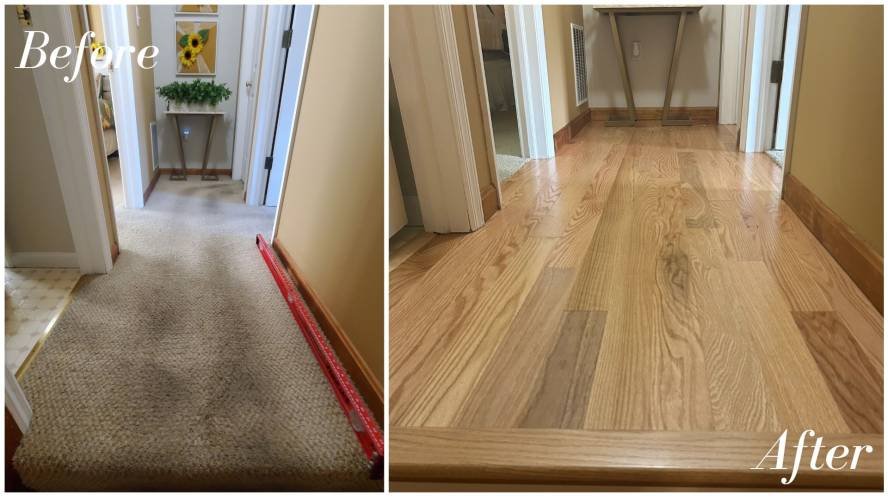
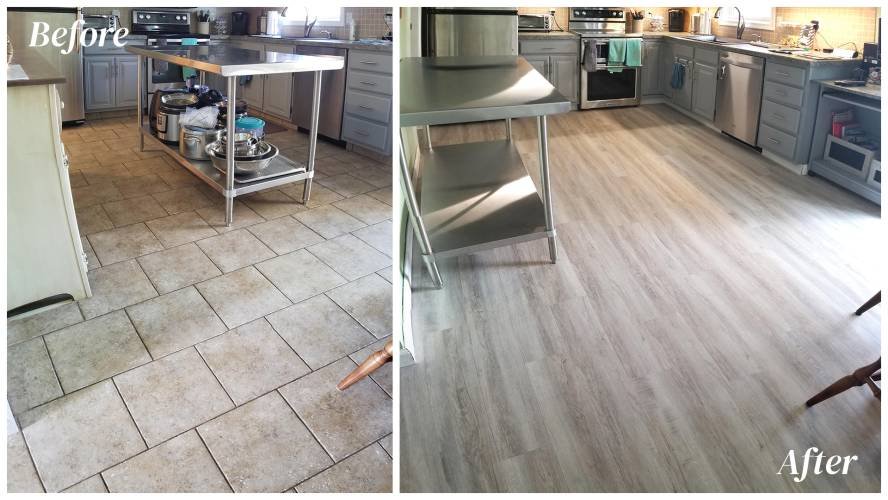
Before & after of our projects